

Pick up, Transportation, & Installation of Package Bees
Congratulations on your new package of bees from Garden Supply Co! While there are many ways to install your bees, we found that this may be the easiest and simplest to explain for beginners. Good luck!
Your hive(s) should be assembled, painted and located at their site BEFORE the bees arrive so they can be installed with out delay. Bees will do best if installed immediately after you get home. If you cannot install the bees due to weather, store them (for up to a day) in a cool, dark area and spray with water or sugar water.
Getting ready you will need:
- Protective clothing of your choice (veil, jacket or suit, gloves, boot bands, etc.)
- Hive tool - Rubber band - Feeders and syrup (pollen patties are optional)
- Syrup in a spray bottle
- Hive set up (hive stand, bottom board, one deep with ONLY 5 frames, feeder, inner and outer covers) You will only need 4 frames if using 8 frame equipment.
- Your package of bees!
Step 1: Preparing your equipment and bees: When you are ready to install, lightly spray the package with sugar syrup (one part white sugar, one part warm water). This will help calm the bees before installing them into the hive. Spraying them will also make the bees less likely to fly. With your equipment in its location, open the hive to expose the frames. Take one of the five frames out and place the rubber band vertically (up and down) around the frame. Set aside. This will be used to hold the queen cage in place once you remove her from the package.
Step 2: Opening the package and Removing the Queen Cage: Using your hive tool, remove the thin wooden cover from the top of the package. Firmly bump the package on the ground to dislodge the bees from the syrup can and queen cage. Now you will see a plastic tab and a can of syrup exposed. Carefully remove the can of syrup and staple on the plastic tab holding the queen cage. Replace the wooden cover so that the bees don't exit from the hole left by the can. Examine the queen cage and verify the queen is alive.
Step 3: Installing the Queen Cage on a Frame: One end of the queen cage contains candy. If there is a cork on the candy end, remove it. Bees will eat the candy and release the queen in a few days. DO NOT remove the cork on the end with no candy. Place the cage between the rubber band and the frame you prepared earlier, CANDY SIDE UP SO THAT THE SCREEN FACES THE BACK OR FRONT OF THE BEEHIVE. This is very important to insure the bees can take care of the queen while she is still in the cage.
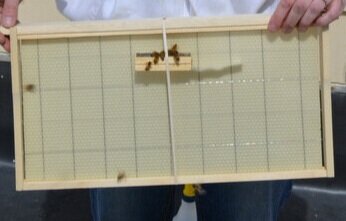
Step 4: Installing the Remaining Bees: Place the frame with the queen into the hive as shown in the picture to the right. Shake about 1 cup or more of bees directly over the queen frame. Place the entire package in the open space in the box. NOTE: If you are using all medium boxes, place a second box on top to make room for your package, OR dump all the bees in and place in additional frames to fill out the box. If additional bees are left, lean the package against the entrance of the hive. The stragglers will find their way in a few hours usually.
Step 5: Feeding: With bees on new equipment it is important to feed, as it takes a lot of energy to draw out (build) new frames. There are many more ways to feed than can be explained here, but here are a few tips:

-If you are using a hive top feeder, do not use an inner cover.
-Use an inner cover if you are using a pail feeder or boardman feeders in the hive. Place these feeders on top of the inner cover so the bees can have access to the syrup. Next, place a deep (or two mediums) around the in-hive feeder. Close the hole on the inner cover with duct tape to prevent robbing
-Use pollen patties when there is little or no pollen available from flowering trees and plants. place pollen on top of you frames or inner cover and add a shim.
-When using liquid feed, syrup should be 1 pound of sugar to one pound (quart) of hot water, cooled before feeding to the bees.
After feeding, close the hive. The size of the entrance should be reduced to an opening of about 1/2-1 inch by using a wooden entrance reducer. Continue feeding the colony until combs are well drawn out (built). Add another box (deep or medium) once most of the frames are drawn out on the initial box (8 frames in a 10 frame box or 6 frames in an 8 frame box). When the bees have established 2two deeps or three mediums, stop feeding and add a super!
Three to five days after installing the package. It is now time to check on the Queen. Remove the empty package at this time. Lean the package against the front of the hive to allow any leftover bees to get to the colony. Check that the queen has been released. If she is still inside the cage, carefully use a nail to make a hole in the candy to make it easier for the bees to release her, replace the cage into the hive. Come back in three days to check to see if she has been released. If she has been released, remove the queen cage. Install the remaining frames that were removed for installation. You can now examine the colony to verify that the queen is laying eggs. You should see eggs and larvae at this point. It is not necessary to find the queen; you know she is present by observing eggs and larvae. If you do not see either eggs or larvae, give us a call (919-460-7747) or email with a picture (jason@gardensupplyco.com), and we can help further diagnose you situation.